
Custom Showers
Waterproofed, custom-tiled showers with niches, benches, and curbless options.
A shower is the hardest tile job in the house. We build it right: full demo, new backer board, Schluter or RedGard waterproofing, pre-sloped pan, flood test, then tile. Niches, benches, linear drains, curbless entries, and glass-ready walls.
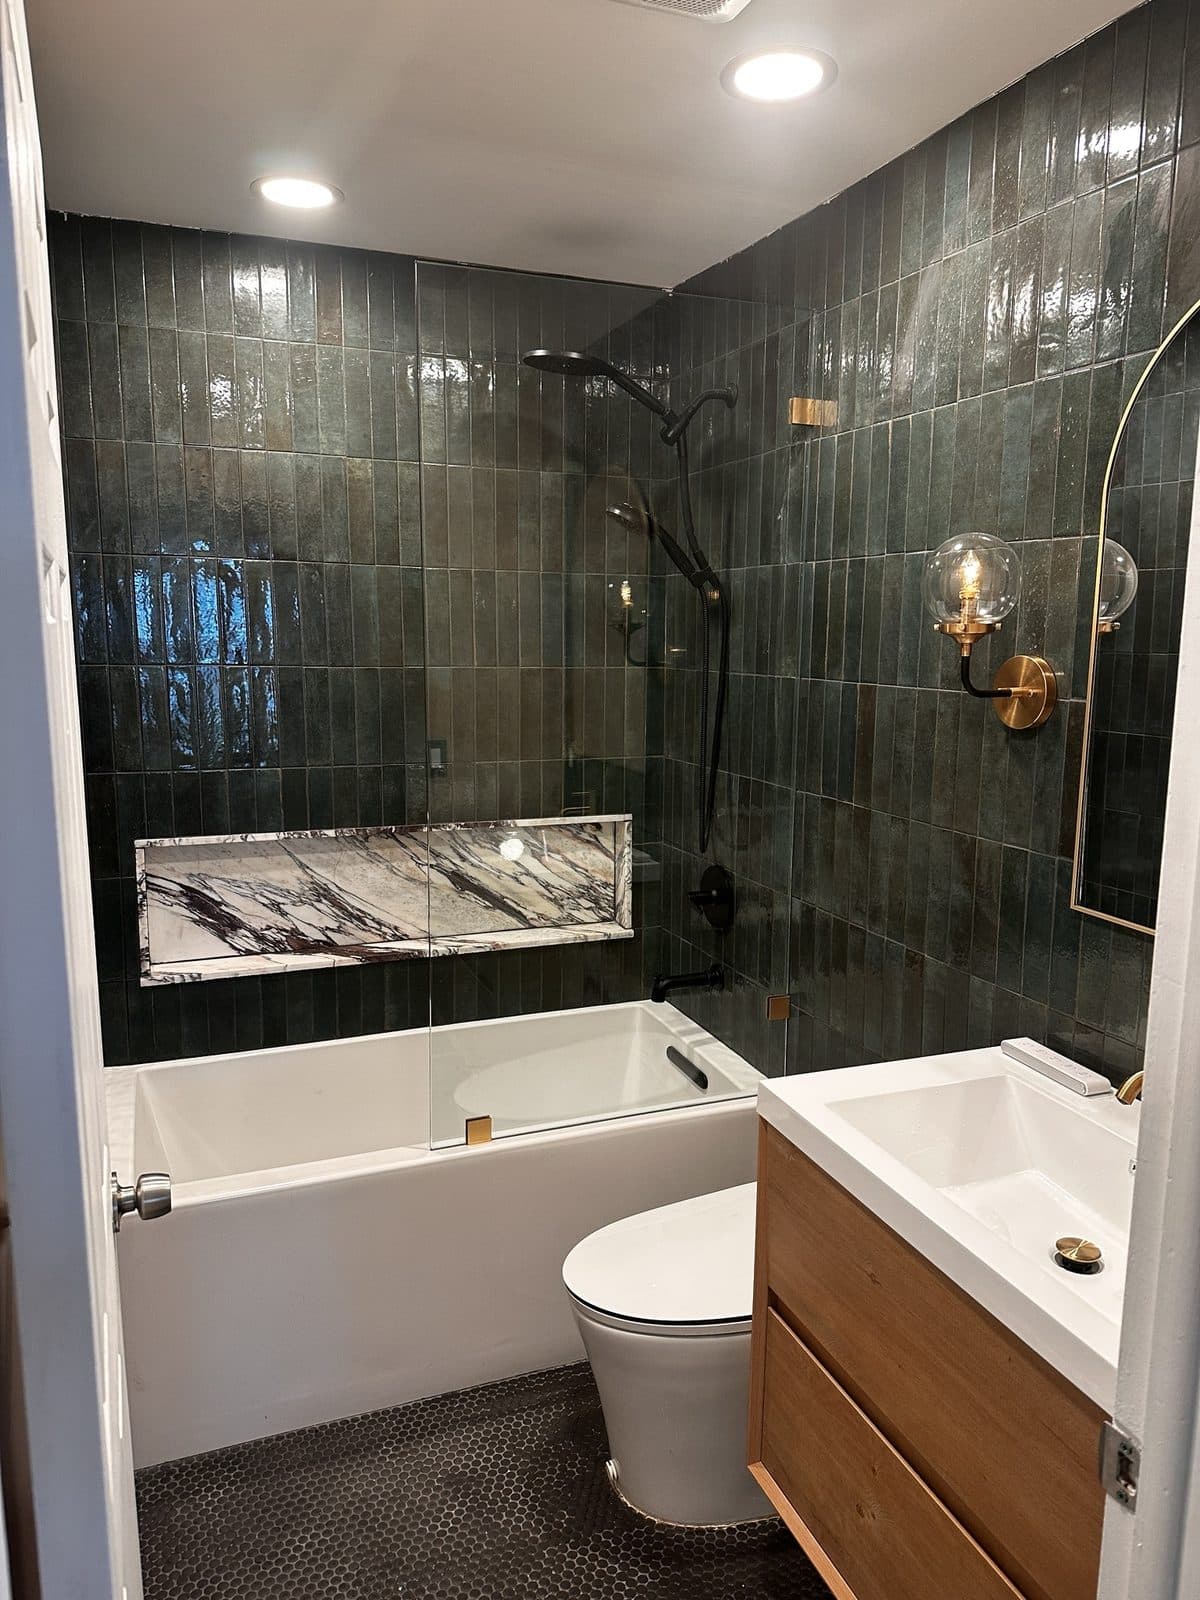
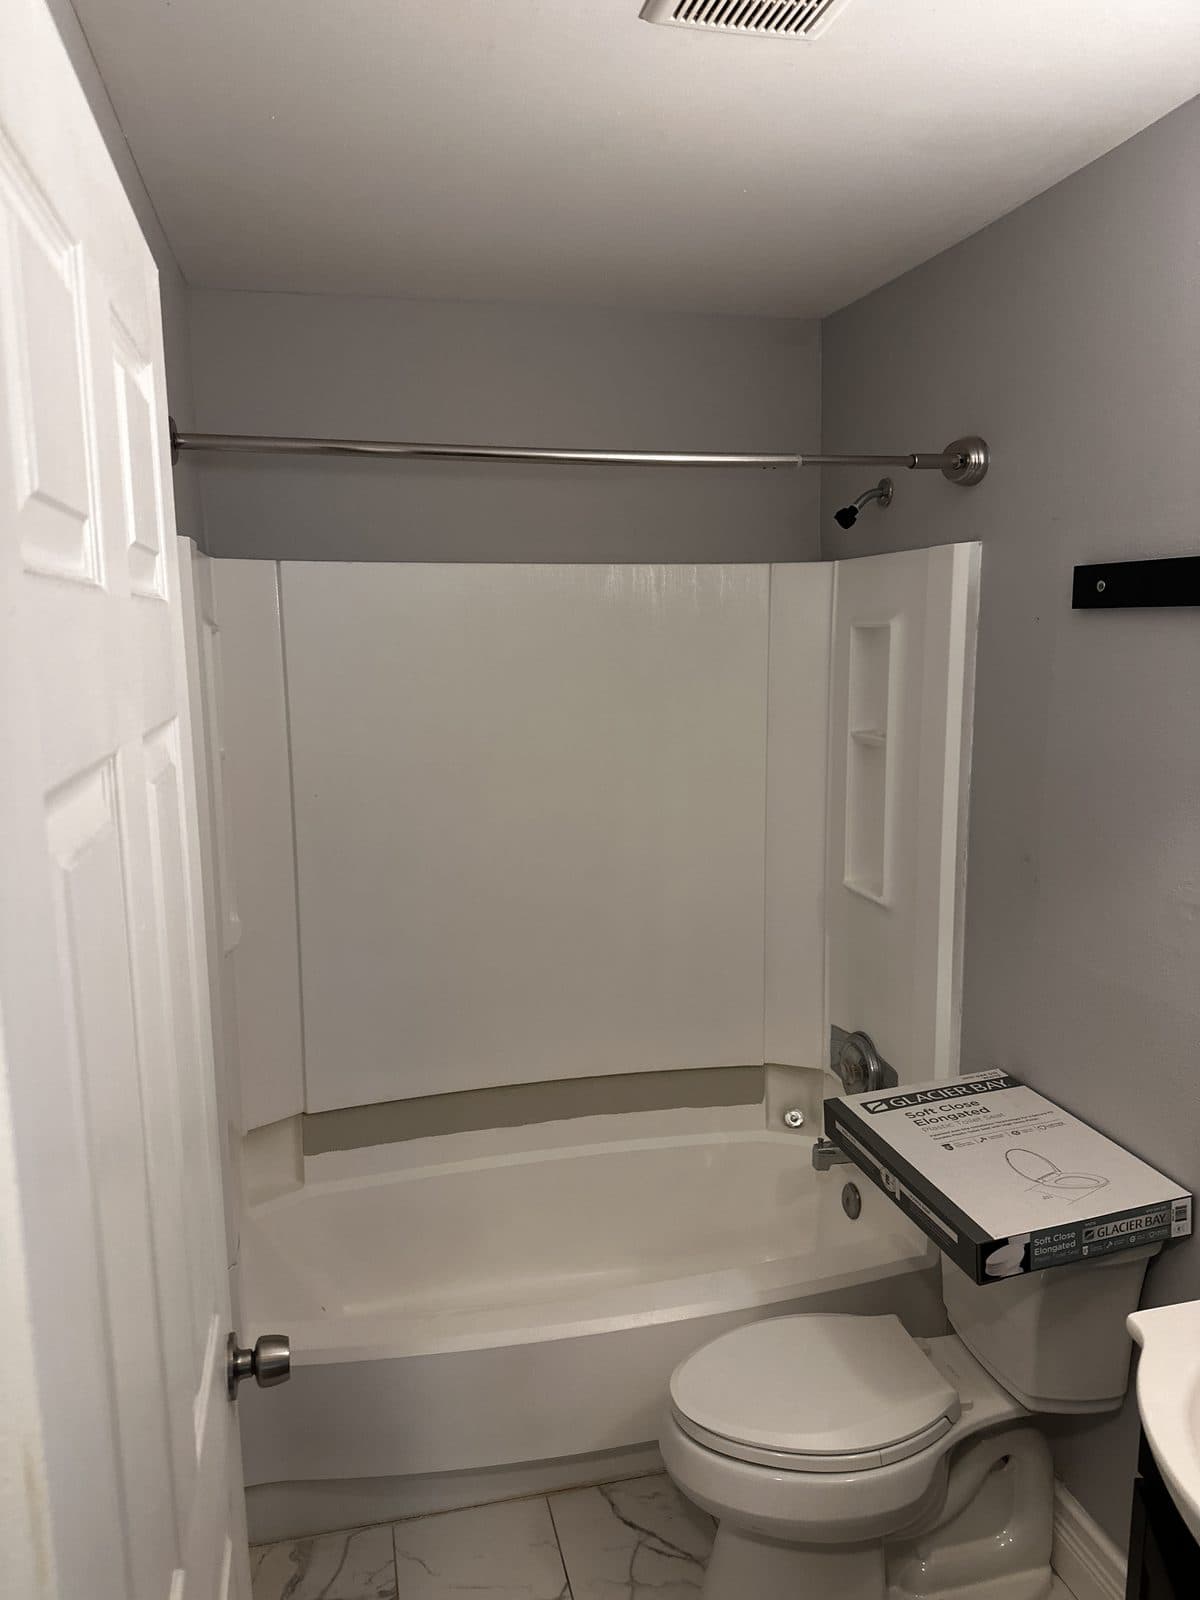
Plain fiberglass tub to green zellige tub surround
Before: builder-grade fiberglass tub surround and a gray box of a bathroom. After: glossy green zellige-look tile stacked floor to ceiling, Calacatta Viola marble niche, matte black fixtures, black penny-round floor, brass sconce, oak floating vanity. Same tub footprint.
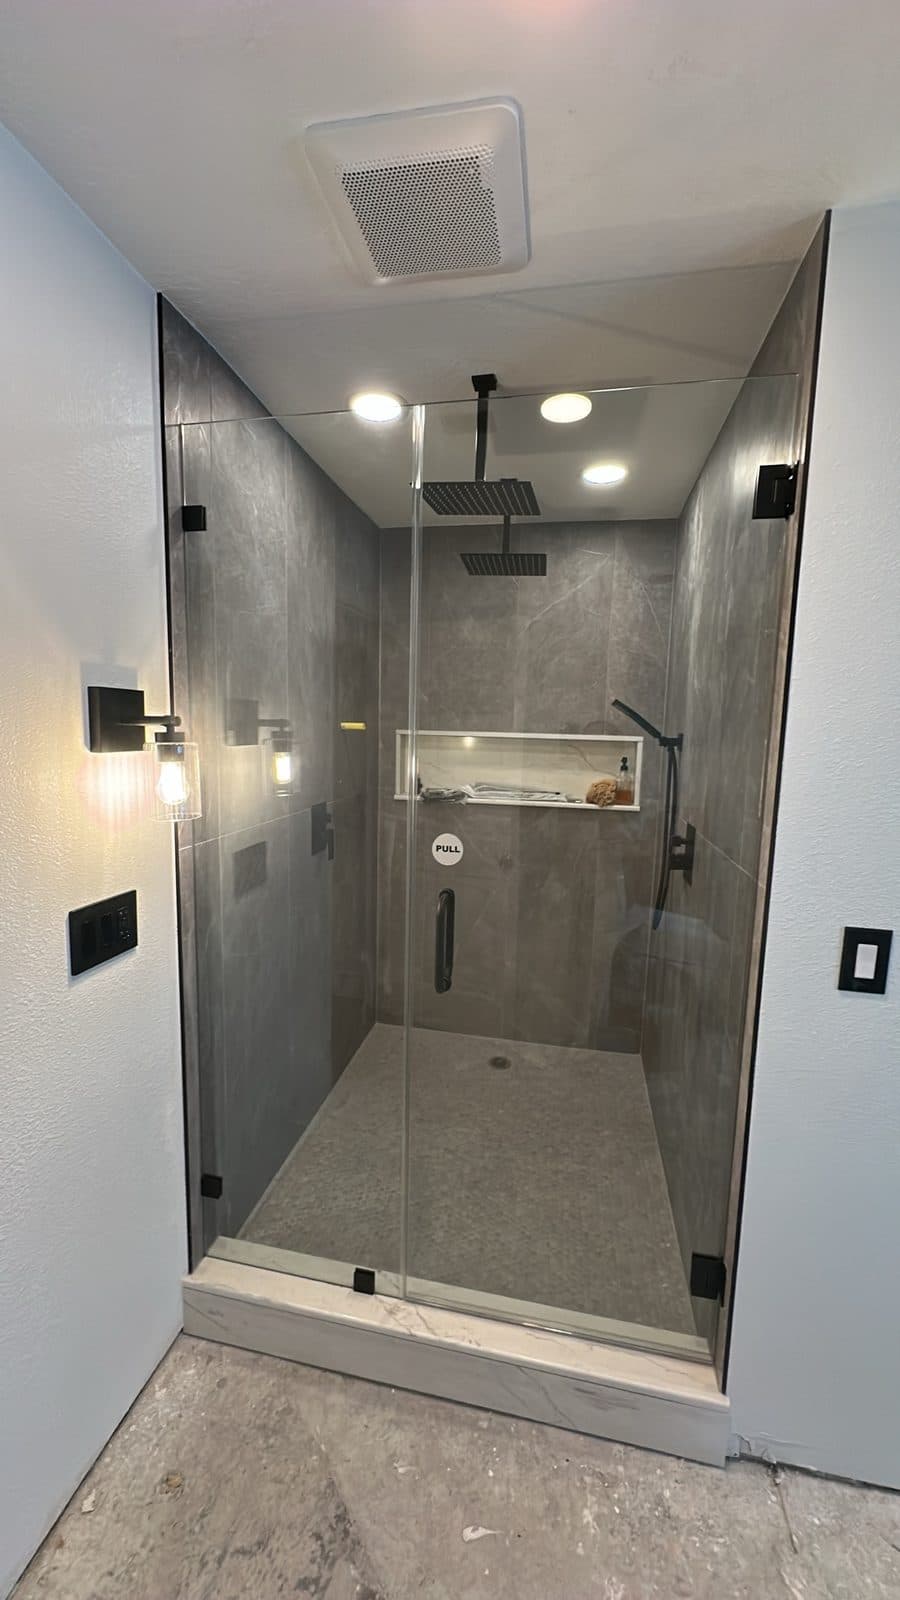
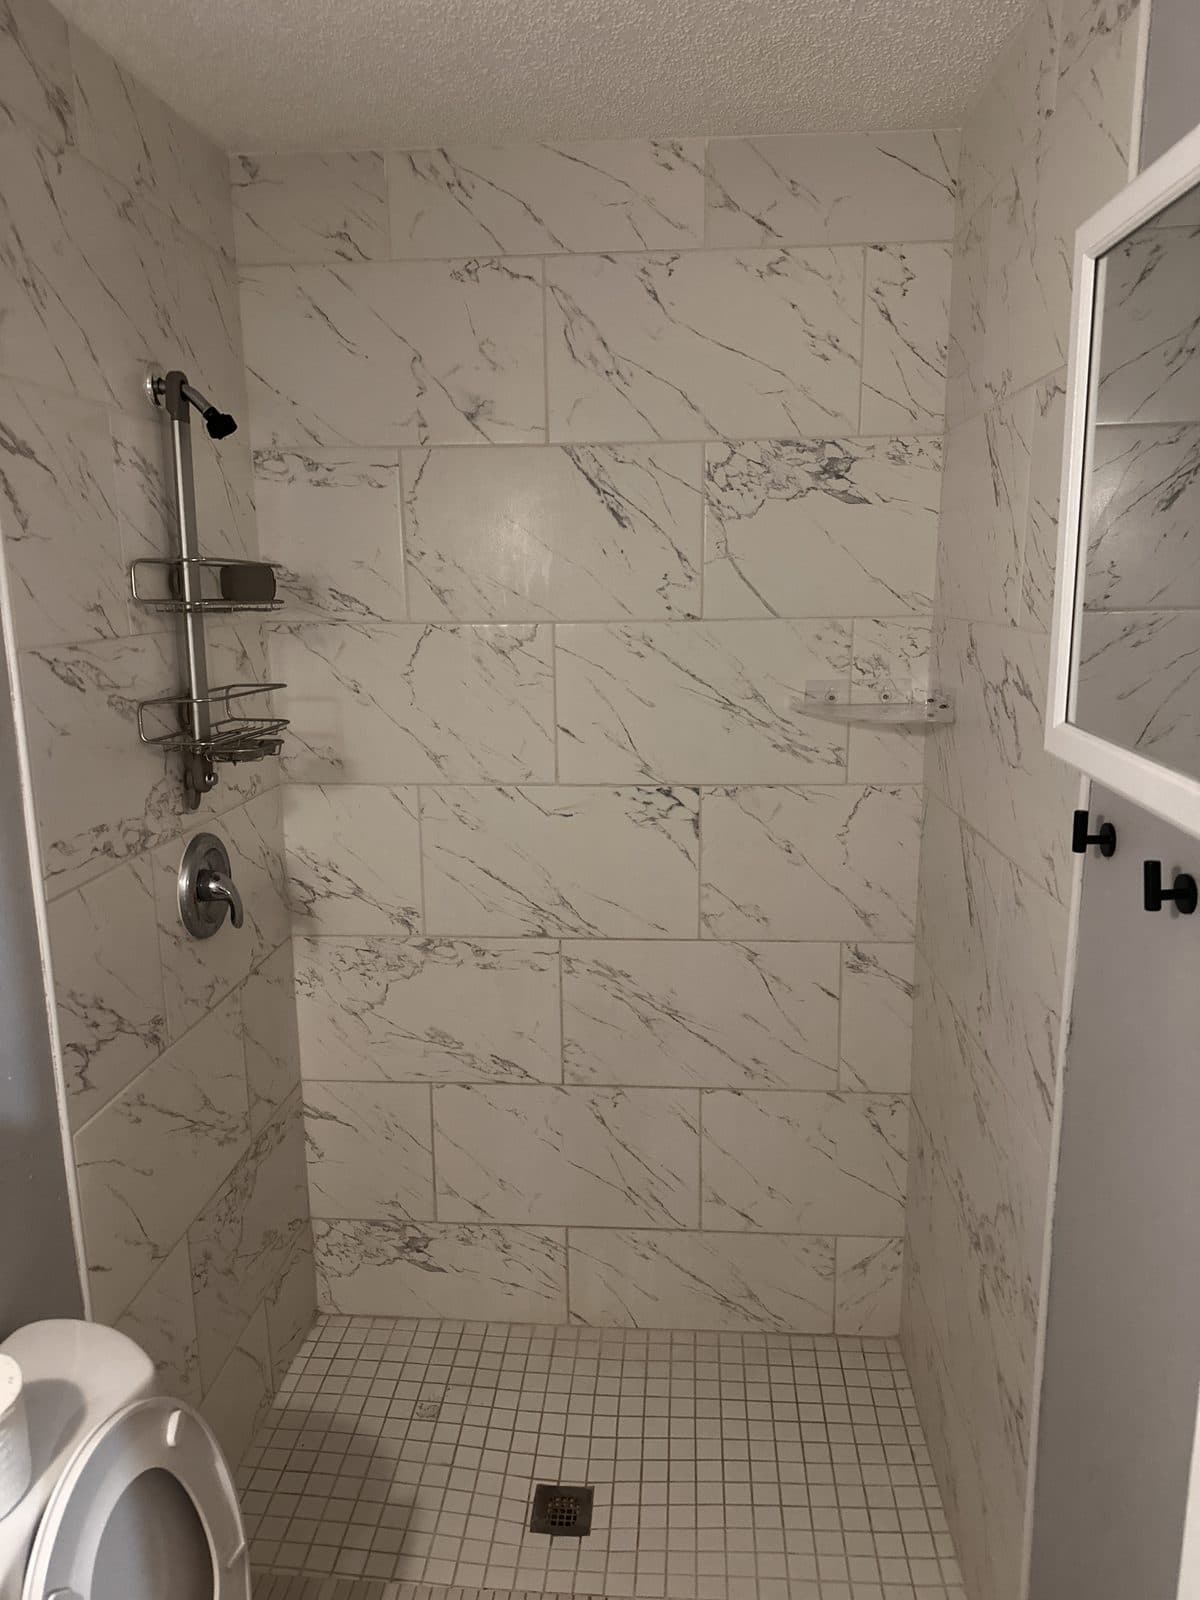
Dated shower to gray large-format with frameless glass
Before: worn 12x24 tile, small mosaic pan, popcorn ceiling, hanging wire caddy. After: 24x48 gray marble-look porcelain, frameless glass door with black hardware, ceiling rain head plus handheld, recessed niche, marble-look curb, textured gray pan, new lighting.
 Finished
Marble-look walk-in shower with floating bench
24x48 marble-look porcelain on the walls, gray pebble mosaic floor, linear drain, floating bench, two shower heads, transom window kept for daylight.
 Finished
White vertical-stack shower with penny tile floor
Glossy 3x12 white tile stacked vertically, white penny-round mosaic pan, matte black square drain, solid curb, terrazzo-look bathroom floor.
 Step 1
Day 1. Floor set and level. Cement board and waterproofing up. First rows of wall tile going on with spacers.
 Step 2
Wide view from the hallway. Shower wall tiled to the niche, half wall framed, floor protected while walls go up.
 Step 3
Niche framed in and tiled with hex marble mosaic. Valve and head rough-ins cut clean.
 Step 4
Walls complete to the ceiling. Pre-sloped pan tiled in hex mosaic. Half wall framed for frameless glass.
 Step 5
Grouted and cleaned. Window wall wrapped in tile. Ready for fixtures and glass.
 Step 6
View from the door. Tile runs floor to ceiling around the window and into the water closet.
Master bath remodel, start to finish
Full gut. New 24x48 porcelain floor, 12x24 marble-look walls to the ceiling, recessed niche with hex marble mosaic, hex mosaic shower pan, half wall ready for glass.
Common questions
How long is my shower out of service?
Most showers take 4 to 7 working days from demo to usable.
Do you do the plumbing?
We set valves and drains in coordination with a licensed plumber when required.
Do you offer curbless showers?
Yes, when the subfloor allows a recessed pan.